The world of customization begins with the desire for such parts. It is good if there are commercially available parts, but it is not uncommon to find parts that do not exist in accordance with one's own customization concept.
While there are enthusiasts who aim for one-of-a-kind customization, there are cases where they have to make their own parts out of necessity. Here, we report on the self-made FRP frame cover for the Honda Shirley (Part 2).
Combine with frame. Match the shape


The motorcycle was placed on the car frame and trimmed while envisioning the finished product. When cutting and matching the shape, it is important to match the shape of the part to be installed with the demolded product, not the base part that was modeled. The final product is to be painted, so the surface of small pinholes, missing parts, and uneven areas that occurred during the FRP application process are prepared for the final paint finish. The concave areas are filled with poly putty and polished repeatedly until there are no more bumps.
Pre-finishing plastic surfacing setup

Maxi was asked to finish the primer-surfacer finish, which serves as the base for the paint. The final semi-gloss black paint was done by the machine owner. The black finish paint was easy to apply because it was finished to a good base.
Self-made bracket with ABS plastic plate


Simply placing the cover on the frame and bolting it down would cause it to rattle. We decided to install a protrusion that hooks onto the frame in front of the cover, just like the OEM cover and the master cover. We cut a piece of ABS material, which is compatible with FRP, about 20 mm wide, and glued it to a step in front of the cover. Let's start with the shape. The ABS board bends easily with heat. A high-calorie handheld heater is used to heat the material board and perform the bending process. Polycarbonate and ABS boards used for carports in parking lots can be bent with great ease when heated. Be careful not to burn yourself. Using a piece of wood as a mold, the heated and softened ABS board is pressed against it and bent in the same way as the wood piece curve. The bent part is used to create the hooks for the frame.
Temporary fixation before full fixation to confirm the position


Without considering the possibility of joining the pieces by flopping them together with FRP from the beginning, the pieces are first temporarily fixed using an applied technique of instant adhesives. Gel-type instant adhesives were used here. You do not need to apply a large amount. The piece is pressed onto the part to be fixed, but instant adhesives cannot bond instantaneously unless the conditions are right, so here, while holding the piece, the instant adhesive coagulation accelerator is sprayed on to temporarily bond the piece. I put it on the frame just to be sure, but there was no misalignment and it seemed to be attached well.
Fill bracket base with talc resin


In the manufacture of FRP resin parts, fine powder of hydrous magnesium silicate, commonly known as talc, is mixed with FRP resin as a filler and used for adhesion. Talc is mixed with flowable poly resin and kneaded into a putty-like consistency. Apply talc resin around the protruding parts and glue them so as to cover the outside.
If too much is applied, the strength will decrease, so use only the proper amount. Talc resin is generally available at modeling stores. Use disposable chopsticks to apply the talc resin-like putty. Now, start reinforcing.
FRP cloth is used for finish reinforcement


Prepare a piece of FRP cloth fiber and reinforce the talc-covered protrusions. After two or three plies, the protrusion is integrated with the body and does not seem to crack from the adhesive part. A small cut is made in the cross fiber to be attached, and the glass fiber is attached so that the protrusion can be passed through the cut. By stretching in this way, the adhesive strength is further enhanced. When the talc resin is semi-dry, poly resin mixed at a ratio of 100 for the base resin and 1 for the hardener is applied with a brush, just as in the normal FRP tensioning process. Be careful not to bite the air at the boundary with the talc layer. Staking is now complete. The pieces were left to cure for at least 24 hours, waiting for them to fully cure before final alignment with the frame. After the pieces are completely dry, the projection angles can be fine-tuned by heating the pieces with a heater.

The one-off cover is completed by drilling holes for fixing bolts on the upper surface near the rear and temporarily fixing the cover with bolts. When permanently installed, a collar was placed behind the cover fastening area so that it can be tightened with firm torque. The finished product is very satisfactory.
POINT
Point 1 - FRP-related products are available in small quantities at model stores.
Point 2 - Brackets are glued and fixed with ABS material plates that are compatible with FRP.
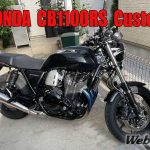
The FRP frame cover that is being made as a one-off is being made for Honda's Chaly early series.
Many custom-built bikes have a big carburetor, which is left exposed and sticking out, with the throttle cable sticking out, etc. We thought that this would not be "Chaly-like". In addition, it is not uncommon to kick off the protruding carb when riding over a motorcycle for practical use. To avoid such problems, we aimed to make a one-off FRP frame cover.
The design base was an aftermarket frame cover for the Shari AT. Based on that part, an FRP female mold was fabricated by attaching extensions. We have been working on stretching the FRP over the female mold, and the result is as you can see. The final result was a semi-gloss black finish using a two-component urethane spray can, but it blends in so well with the design that it often goes unnoticed by fellow bikers.
Here is a report on the finishing process. Instead of simply covering the cover, a satisfactory finish that can be firmly fixed was obtained by attaching projecting hooks. The ABS material plate attached is said to be a material that is compatible with FRP resin and relatively easy to adhere. Another important feature of this material is that it can be easily bent by heating it with a heater. It can be cut out with a special P-cutter in the same way as acrylic sheets are cut, so if you have a piece of material, it should be useful for repairing side covers when repairing resin parts. ABS material sheets can also be purchased at model specialty stores that specialize in FRP and acrylic crafts.