This is Webike "Review" section, where we collect riders' "real voices". You can submit any kind of motorcycle products or custom parts that you want to buy on Webike, and we will give you up to 500 points that you can use for shopping on Webike.
We've taken the liberty of picking out some "best" reviews from October 3 to October 9, 2020 and we'd like to share it with you!
This week's pickup review
Excellent value for money!

BMW motorcycles are well built and easy to ride, even for the Japanese. However, the design itself is tailored to the physique of Westerners, so the seat is high and the handlebars are far away.
I am 5'7" tall, but fortunately, I was born with longer limbs than others, so I can enjoy riding the large S1000XR. However, after a long day of touring, fatigue builds up in my arms and back and it turns into pain.
I always felt this was due to the distance of the handlebars, after all. I was looking for a solution and found that Wonderlich had a handlebar up kit (bar riser), but I was honestly quite hesitant to purchase it because I didn't see any impressions of the same model. However, the price was affordable, so I decided to take the adventure.
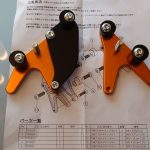
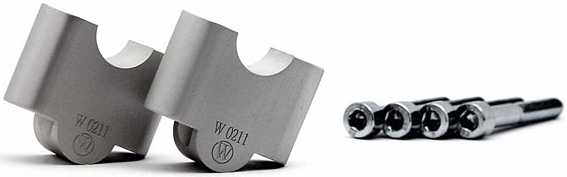
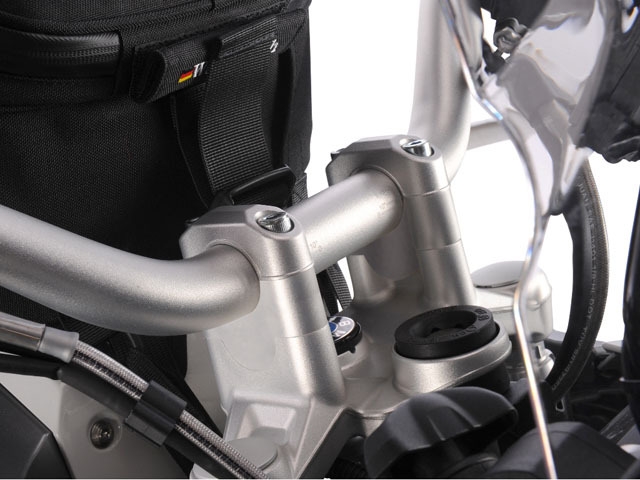
The product I received came in a handy cardboard box. The material of the cardboard box was good and not the low-quality paper that is often found in imported products. When you open the box, you will find the body and mounting bolts carefully wrapped in cream-colored recycled paper. The body is made of aluminum and has a very refined finish. It is made in Germany. I can trust that it is similar to Japanese products.
However, I was disappointed that the mounting bolts were made of chrome plated iron, not stainless steel.
Installation
*If you are not confident about the installation, please ask your dealer for help. The parts are imported and expensive, so if you have any trouble after installation, you will be in big trouble. Please install at your own risk.
- The handlebar riser itself is easy to install, just insert it into the bottom of the handlebar and tighten with the included bolts, but you need to pay attention to the following. You need to use T45 Torque wrench to install the stock bolts and the bolts that come with the kit, L type wrench is fine, but if you want to control the torque, socket wrench type is recommended.
- Hang both ends of the handle with a string from above before you start work. If you loosen the handle set bolts without doing anything, the handle may fall toward you suddenly. And cover the entire tank with a soft cloth to prevent scratches.
- As the handlebar mounting position changes, be careful not to overdo it when handling the clutch wires, brake hoses and wiring.
- Follow the clutch wire and brake hose from around the steering head and into the right side of the body fairing. After installing the kit, remove the right side fairing to make sure there is no strain on the wires and hoses when the steering wheel is fully locked to the left and right.
- Loosen the 4 stock set bolts and take out only the bolts, and set the handlebars free with the upper holder. Check if the 4 bolts are lightly tightened in this state. If one of the bolts is too heavy, remove it and fix the problem (broken thread, etc.).
Note: If you ruin the steering head's steering wheel holder female screw, you'll be spending a hell of a lot of money.
- Carefully lift up the handlebars (the slinging strap is too long and unstable) and insert the left and right bar risers between them. Look at the picture in the instruction manual to make sure you are facing in the right direction.
- Insert the bolts into the right and left side lightly and tighten them. At this point, readjust the length of the slinging string to make it easier to adjust the handle position.
- Add the other two bolts and tighten the remaining four bolts temporarily, but if the bolts cannot be lightly fastened by bare hands, the bolt holes may not be aligned, so move the handle back and forth, left and right, and try tightening them to the temporary tightening position.
- In my case, there was a slight distortion (eccentricity) of the attached bolts, and they were lightly touching the bolt holes of the upper holder and the bar riser, so I pulled them out once and applied a thin layer of grease to the part of the bolt that was not cut and tightened them again, then I was able to lightly tighten them temporarily.
- Check the tightening position of the steering wheel. Check for any discrepancies in left or right position, handlebars tipping backwards or forward, etc., by straddling the seat and actually holding the handlebars to determine the final position.
- In my case, the most comfortable grip position was when it was fixed in the same position as the stock one.
- Apply a small amount of liquid thread locker supplied with the bar riser to the threads. Tighten 2 bolts on the front side of the body first to make sure upper holder and bar riser are in contact. Next, tighten the rear two with standard torque to complete the installation. It is normal for the rear side to have a gap. At this time, the position of handlebars may change slightly.
- When the installation is complete, remove the suspension strap and turn the handlebars slowly until you hit the left and right stoppers and carefully check the clutch wire and brake hose for sticking. If the brake hose is pulling hard, especially when turned to the left, you will need to replace it with a longer hose.
-In my S1000XR, the clutch wires and brake hoses were just barely fine with the stock ones. As expected, Wonderlich makes products with exquisite saltiness.

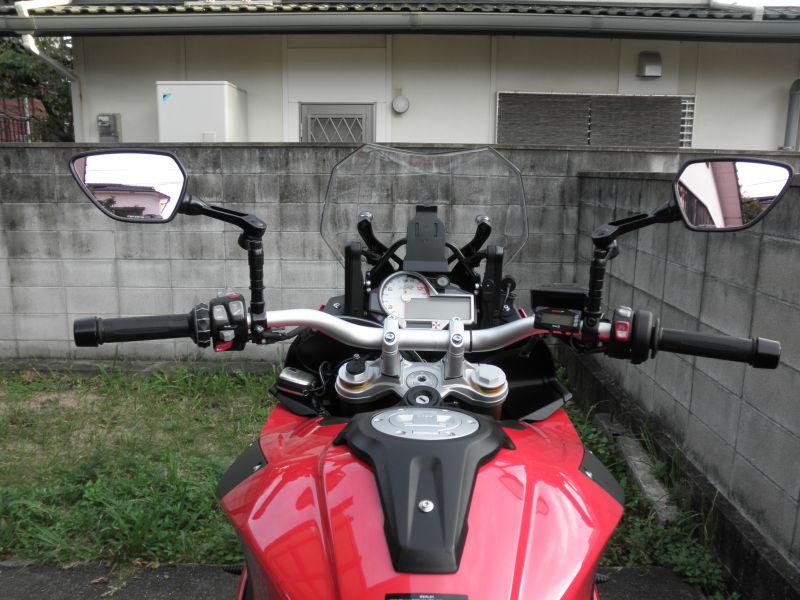
When I straddled it.
- Before I installed it, I was in a riding position where I felt I was leaning slightly forward and far away from the handlebars. After the installation, I feel like I can reach the grip naturally when I sit on the seat and extend my hand. And of course, it seems to be longer from the handlebar. You will get used to it.
When I actually drive it.
- I didn't have time to do a test ride, so my first ride ended up being tandem touring with my wife. Unlike riding alone, the motorcycle is heavy, but even after a day's ride, I hardly feel the pain from wrist and back fatigue anymore. The riding feel is the same. I can think that this brings me one step closer to a comfortable position. I am looking forward to future touring.
Finally
Ease of installation, product finish, and low price are all cost-effective. I would recommend this one to anyone who drives the same BMW S1000XR.
(Webike staff: from Canako)
Thanks for the great review, Kazy! You will receive 1000 points to spend on shopping at Webike!
Webike has a special "Review" section where you can post your review of our products and services. Post a review and get up to 500 points for free, so we look forward to hearing your real voice.
See Accessories for WUNDERLICH
See BMW Moto Index Page
See Accessories for BMW S1000XR